1. Apache + PHP + Mariadb 설치하기
페이지 정보
작성자 관리자 댓글 1건 조회 12,931회 작성일 18-10-07 21:23본문
1. Apache + PHP + Mariadb 설치하기
(1) Mariadb 설치하기
# yum install mariadb-server mariadb-client -y
# systemctl start mariadb
# systemctl enable mariadb
Created symlink from /etc/systemd/system/multi-user.target.wants/mariadb.service to /usr/lib/systemd/system/mariadb.service.
관리자 비밀번호를 만들고, 몇가지 설정을 합니다.
# mysql_secure_installation
NOTE: RUNNING ALL PARTS OF THIS SCRIPT IS RECOMMENDED FOR ALL MariaDB
SERVERS IN PRODUCTION USE! PLEASE READ EACH STEP CAREFULLY!
In order to log into MariaDB to secure it, we'll need the current
password for the root user. If you've just installed MariaDB, and
you haven't set the root password yet, the password will be blank,
so you should just press enter here.
Enter current password for root (enter for none): [엔터]
OK, successfully used password, moving on...
Setting the root password ensures that nobody can log into the MariaDB
root user without the proper authorisation.
Set root password? [Y/n] [엔터]
New password: 암호 [엔터]
Re-enter new password: 암호 [엔터]
Password updated successfully!
Reloading privilege tables..
... Success!
By default, a MariaDB installation has an anonymous user, allowing anyone
to log into MariaDB without having to have a user account created for
them. This is intended only for testing, and to make the installation
go a bit smoother. You should remove them before moving into a
production environment.
Remove anonymous users? [Y/n] [엔터]
... Success!
Normally, root should only be allowed to connect from 'localhost'. This
ensures that someone cannot guess at the root password from the network.
Disallow root login remotely? [Y/n] [엔터]
... Success!
By default, MariaDB comes with a database named 'test' that anyone can
access. This is also intended only for testing, and should be removed
before moving into a production environment.
Remove test database and access to it? [Y/n] [엔터]
- Dropping test database...
... Success!
- Removing privileges on test database...
... Success!
Reloading the privilege tables will ensure that all changes made so far
will take effect immediately.
Reload privilege tables now? [Y/n] [엔터]
... Success!
Cleaning up...
All done! If you've completed all of the above steps, your MariaDB
installation should now be secure.
Thanks for using MariaDB!
(2) Apache 웹서버 설치
# yum install -y httpd
# systemctl start httpd
# systemctl enable httpd
Created symlink from /etc/systemd/system/multi-user.target.wants/httpd.service to /usr/lib/systemd/system/httpd.service.
(3) PHP 설치
# yum install -y php php-mysql
# yum -y install openssl-devel
# yum -y install gcc php-pear php-devel
# systemctl restart httpd
PHP 설치확인을 위해 홈디렉토리에 웹페이지를 만든다.
# vi /var/www/html/phpinfo.php
<?php
phpinfo();
?>
(4) 방화벽 설정
http로 접속할 수 있도록 포트를 열어줍니다.
# firewall-cmd --permanent --add-service=http
success
방화벽을 다시 로드합니다.
# firewall-cmd --reload
success
(5) PHP 설정 확인하기
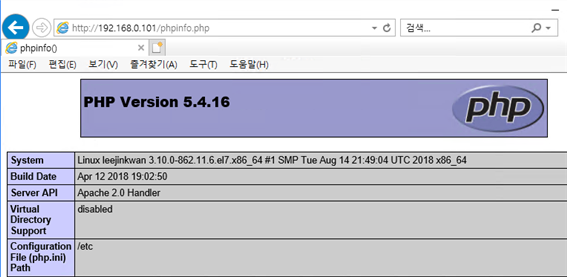
http://192.168.0.101/phpinfo.php 로 접속합니다.

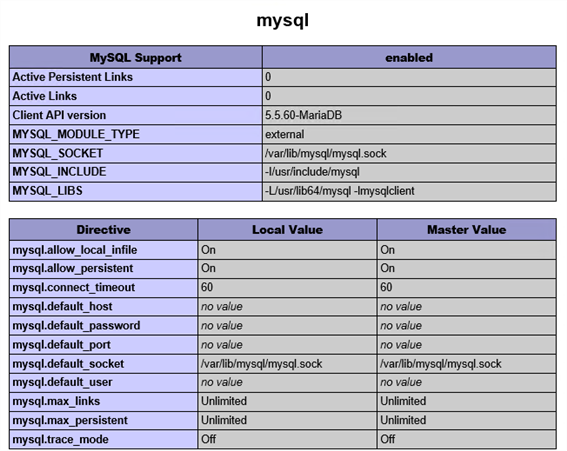
중간쯤에서 mysql 설치 정보을 볼수 있습니다.

(6) phpMyAdmin 설치
# yum -y install phpmyadmin
# vi /etc/httpd/conf.d/phpMyAdmin.conf
<Directory /usr/share/phpMyAdmin/>
AddDefaultCharset UTF-8
<IfModule mod_authz_core.c>
# Apache 2.4
<RequireAny>
# Require ip 127.0.0.1
# Require ip ::1
Require all granted
# Require ip xxx.xxx.xxx.xxx /* 외부 접속 IP 설정 */
</RequireAny>
</IfModule>
아파치 웹서버를 재시작합니다.
# systemctl restart httpd
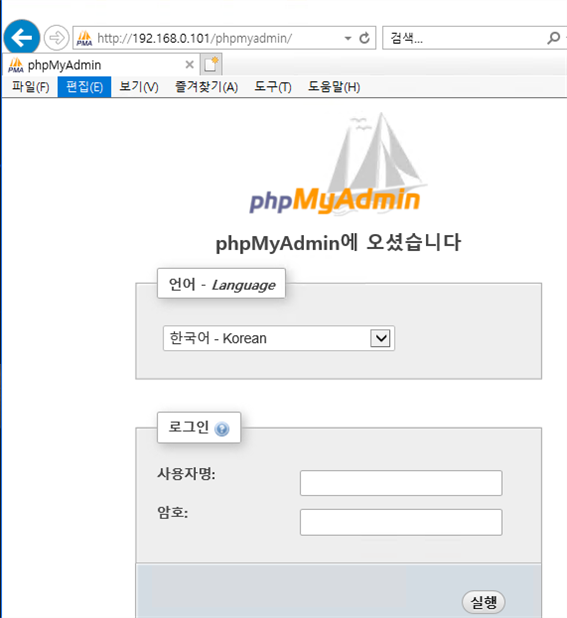
http://192.168.0.101/phpmyadmin/ 에 접속하여 확인합니다.

댓글목록
관리자님의 댓글
관리자 작성일
The mcrypt extension is missing. Please check your PHP configuration.
yum install php-mcrypt
