1. 카메라 사용하기
페이지 정보
작성자 관리자 댓글 0건 조회 5,273회 작성일 20-03-15 14:06본문
1. 카메라 사용하기
1. 새 프로젝트 생성
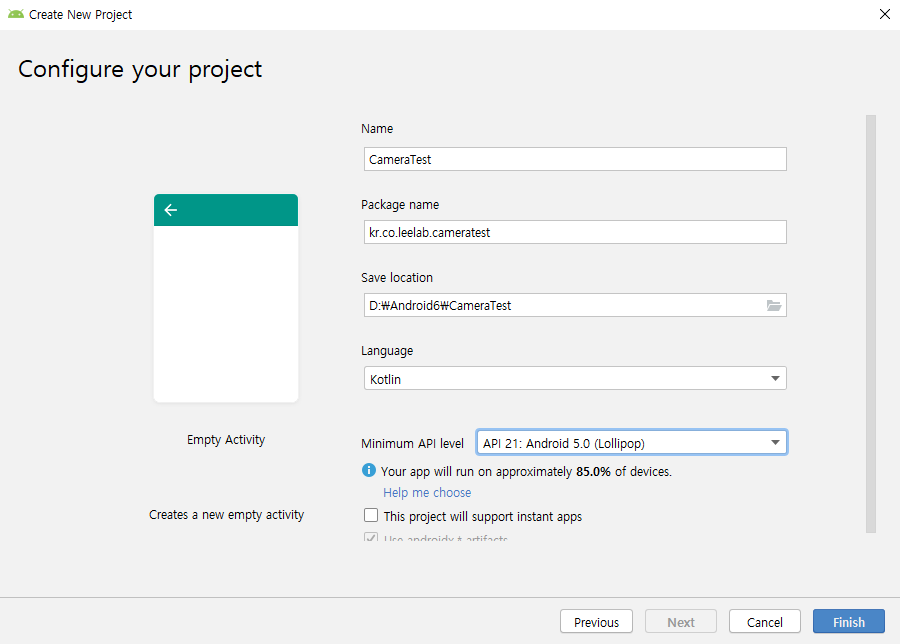
프로젝트명은 CameraTest로 한다.
권한 추가
AndroidManifest.xml 파일에 다음 권한을 추가했는지 확인하십시오.
<uses-permission android:name="android.permission.READ_EXTERNAL_STORAGE"/>
<uses-permission android:name="android.permission.CAMERA"/>
<uses-permission android:name="android.permission.WRITE_EXTERNAL_STORAGE"/>
레이아웃 설정
MainActivity .kt의 레이아웃 파일을 설정하려고합니다.
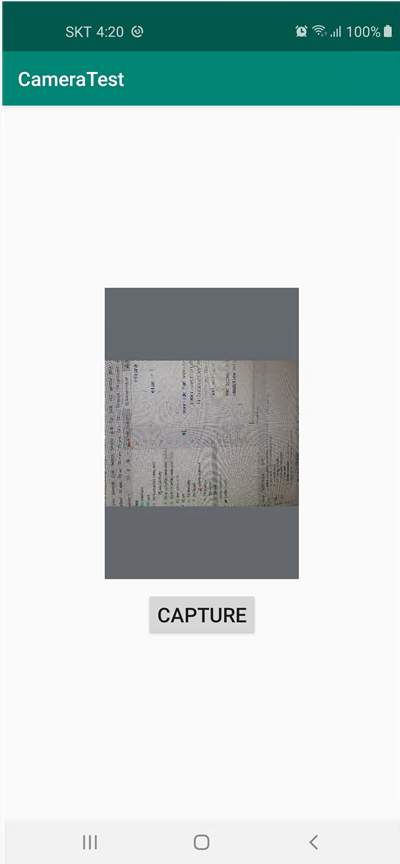
레이아웃은 아래와 같이 ImageView와 캡처 버튼으로 구성됩니다.
<?xml version="1.0" encoding="utf-8"?>
<RelativeLayout
    xmlns:android="http://schemas.android.com/apk/res/android"
    xmlns:tools="http://schemas.android.com/tools"
    android:layout_width="match_parent"
    android:layout_height="match_parent"
    tools:context=".MainActivity">
    <LinearLayout
        android:layout_centerInParent="true"
        android:orientation="vertical"
        android:layout_width="match_parent"
        android:layout_height="wrap_content">
        <ImageView
            android:id="@+id/image_view"
            android:background="@drawable/img_placehlder"
            android:layout_gravity="center_horizontal"
            android:layout_width="200dp"
            android:layout_height="300dp" />
        <Button
            android:id="@+id/btn_capture"
            android:text="Capture"
            android:layout_marginTop="12dp"
            android:layout_gravity="center_horizontal"
            android:layout_width="wrap_content"
            android:layout_height="wrap_content" />
    </LinearLayout>
</RelativeLayout>
레이아웃은 다음과 같습니다.
MainActivity 설정
이제 MainActivity.kt를 설정하겠습니다.
manifest 파일에서 권한을 선언 한 다음 사용자가 각 권한을 승인하거나 거부 할 수 있도록 런타임에서 이러한 권한을 요청해야합니다.
권한을 확인하고 권한을 요청하려면 다음 코드를 추가하십시오.
private fun checkPersmission(): Boolean {
    return (ContextCompat.checkSelfPermission(this, android.Manifest.permission.CAMERA) ==
            PackageManager.PERMISSION_GRANTED && ContextCompat.checkSelfPermission(this,
        android.Manifest.permission.READ_EXTERNAL_STORAGE) == PackageManager.PERMISSION_GRANTED)
}

private fun requestPermission() {
    ActivityCompat.requestPermissions(this, arrayOf(READ_EXTERNAL_STORAGE, CAMERA), PERMISSION_REQUEST_CODE)
}
캡처 버튼 클릭하면 이 권한을 확인하려고합니다.
따라서 사용자에게 이미 카메라 및 외부 저장소에 액세스 할 수있는 권한이 부여 된 경우 카메라를 직접 열어 사진을 찍을 수 있습니다.
그러나 권한 요청 후 사용자가 수락 한 경우 카메라를 열려면 onRequestPermissionsresult ()를 관리해야합니다.
여기에는 나중에 정의되는 takePicture () 메소드가 포함됩니다.
코드는 아래와 같습니다.
override fun onRequestPermissionsResult(requestCode: Int, permissions: Array<out String>, grantResults: IntArray) {
    when (requestCode) {
        PERMISSION_REQUEST_CODE -> {

            if ((grantResults.isNotEmpty() && grantResults[0] == PackageManager.PERMISSION_GRANTED)
                && grantResults[1] == PackageManager.PERMISSION_GRANTED) {
                takePicture()
            } else {
                Toast.makeText(this, "Permission Denied", Toast.LENGTH_SHORT).show()
            }
            return
        }
        else -> {
        }
    }
}
이제 takePicture () 메서드를 살펴 보겠습니다.
이 메소드에서는 카메라를 열도록 설정했습니다.
이 메소드는 이미지를 저장할 파일을 작성하는 데 사용되는 createFile ()이라는 메소드로 구성됩니다.
@Throws(IOException::class)
private fun createFile(): File {
    // Create an image file name
    val timeStamp: String = SimpleDateFormat("yyyyMMdd_HHmmss").format(Date())
    val storageDir: File? = getExternalFilesDir(Environment.DIRECTORY_PICTURES)
    return File.createTempFile(
        "JPEG_${timeStamp}_", /* prefix */
        ".jpg", /* suffix */
        storageDir /* directory */
    ).apply {
        // Save a file: path for use with ACTION_VIEW intents
        mCurrentPhotoPath = absolutePath
    }
}
응용 프로그램에 provider를 추가하려면 앱의 manifest.xml 파일에서 FileProvider를 구성해야합니다.
<application
- - - -
    <provider
        android:name="androidx.core.content.FileProvider"
        android:authorities="kr.co.leelab.fileprovider"
        android:exported="false"
        android:grantUriPermissions="true">
        <meta-data
            android:name="android.support.FILE_PROVIDER_PATHS"
            android:resource="@xml/file_path">
        </meta-data>
    </provider>
</application>
res / xml 폴더에 새 xml 파일 file_path.xml을 작성하십시오.
"kr.co.leelab.cameratest"대신 경로에 패키지 이름을 추가합니다..
<?xml version="1.0" encoding="utf-8"?>
<paths xmlns:android="http://schemas.android.com/apk/res/android">
    <external-path name="my_images"
        path="Android/data/kr.co.leelab.cameratest/files/Pictures" />
</paths>
이제 다음과 같이 이미지를 캡처하기 위해 카메라를 시작하도록 설정할 수 있습니다
private fun takePicture() {
    val intent: Intent = Intent(MediaStore.ACTION_IMAGE_CAPTURE)
    val file: File = createFile()
    val uri: Uri = FileProvider.getUriForFile(
        this,
        "kr.co.leelab.fileprovider",
        file
    )
    intent.putExtra(MediaStore.EXTRA_OUTPUT, uri)
    startActivityForResult(intent, REQUEST_IMAGE_CAPTURE)
}
이 메소드로 카메라가 열리고 이미지를 캡처 할 수 있습니다.
사진을 촬영 한 후 ImageView에이 이미지를 표시해야합니다.
ImageView를 설정하려면 다음 코드를 추가하십시오.
override fun onActivityResult(requestCode: Int, resultCode: Int, data: Intent?) {
    super.onActivityResult(requestCode, resultCode, data)
    if (requestCode == REQUEST_IMAGE_CAPTURE && resultCode == Activity.RESULT_OK) {
        //To get the File for further usage
        val auxFile = File(mCurrentPhotoPath)

        var bitmap: Bitmap = BitmapFactory.decodeFile(mCurrentPhotoPath)
        imageView.setImageBitmap(bitmap)
    }
}
이제 우리는 모두 프로젝트를 실행하도록 설정되었습니다.