7. Fragment 실습
페이지 정보
작성자 관리자 댓글 1건 조회 6,436회 작성일 20-07-01 20:35본문
7. Fragment 실습
로그인 Fragment를 만들고 메인 액티비티에서 보여주는 실습을 해보겠습니다.
1. 프로젝트 생성
프로젝트명 : FragmentTest
2. Fragment 생성
Fragment는 Android Studio를 사용하고 있다면 손쉽게 생성할 수 있다.
Fragment를 생성하고자 하는 폴더에 오른쪽 버튼을 눌러 빈 Fragment를 생성하면 Fragment의 xml 파일과 kotlin 파일이 생성된다.
직접 생성하여 추가해 보겠다.
파일명 : fragment_login.xml
먼저, 앱 로고 - 로그인 버튼 - 회원가입 버튼 이렇게 화면 구성을 해보자.
<?xml version="1.0" encoding="utf-8"?>
<FrameLayout xmlns:android="http://schemas.android.com/apk/res/android"
xmlns:tools="http://schemas.android.com/tools"
android:layout_width="match_parent"
android:layout_height="match_parent"
tools:context="LoginFragment">
<LinearLayout
android:layout_width="match_parent"
android:layout_height="match_parent"
android:orientation="vertical"
android:weightSum="3.5">
<RelativeLayout
android:layout_width="match_parent"
android:layout_height="1dp"
android:layout_weight="1.5">
<ImageView
android:layout_width="wrap_content" android:layout_height="wrap_content"
android:layout_centerVertical="true"
android:layout_centerHorizontal="true"/>
</RelativeLayout>
<LinearLayout
android:layout_width="match_parent" android:layout_height="1dp"
android:orientation="vertical"
android:layout_weight="2">
<Button
android:id="@+id/login_btn"
android:layout_width="match_parent" android:layout_height="wrap_content"
android:text="간편 로그인"/>
<Button
android:layout_width="match_parent" android:layout_height="wrap_content"
android:text="회원 가입"/>
</LinearLayout>
</LinearLayout>
</FrameLayout>
FrameLayout이 root 레이아웃이 되고 그 내부에서 구성을 해주면 된다.
간단히 Fragment를 보여줄 때는 onCreate, onCreateView 메서드만 오버라이딩하면 된다.
프레그먼트의 상태유지를 위해서는 onAttach, onDetach 메서드를 오버라이딩하면 되지만 여기선 넘어가겠다.
파일명 : LoginFragment.kt
package kr.co.leelab.fragmenttest

import android.os.Bundle
import android.view.LayoutInflater
import android.view.View
import android.view.ViewGroup
import androidx.fragment.app.Fragment

class LoginFragment : Fragment() {
override fun onCreate(savedInstanceState: Bundle?) {
super.onCreate(savedInstanceState)
    }

override fun onCreateView(inflater: LayoutInflater, container: ViewGroup?,
                              savedInstanceState: Bundle?): View? {
val view = inflater.inflate(R.layout.fragment_login, null)
// 처리
        return view
    }
}
3. Activity에 Fragment 띄우기
Fragment는 Activity의 구성요소로 존재하게 된다. 따라서 다른 버튼, 텍스트뷰처럼 보여질 위치를 xml로 코딩해야 한다.
파일명 : activity_main.xml
<?xml version="1.0" encoding="utf-8"?>
<LinearLayout
xmlns:android="http://schemas.android.com/apk/res/android"
xmlns:tools="http://schemas.android.com/tools"
xmlns:app="http://schemas.android.com/apk/res-auto"
android:layout_width="match_parent"
android:layout_height="match_parent"
tools:context=".MainActivity">
<FrameLayout
android:id="@+id/fragment"
android:layout_width="match_parent"
android:layout_height="match_parent"/>
</LinearLayout>
FrameLayout의 위치가 Fragment가 보여질 위치이므로 여기서는 Fragment가 액티비티 전체를 차지하게 된다.
이제 Fragment를 띄어주는 코드만 작성하면 끝이다.
파일명 : MainActivity.kt
package kr.co.leelab.fragmenttest

import androidx.appcompat.app.AppCompatActivity
import android.os.Bundle


class MainActivity : AppCompatActivity() {
override fun onCreate(savedInstanceState: Bundle?) {
super.onCreate(savedInstanceState)
        setContentView(R.layout.activity_main)

supportFragmentManager.beginTransaction()
            .replace(R.id.fragment, LoginFragment())
            .commit()

    }
}
원래 getSupportFragmentManager()를 호출해서 인스턴스 얻어 사용했지만 여기서는 supportFragmentManager와 같이 변수처럼 사용한다는 점이다.
Kotlin으로 변경되면서 싱글톤 패턴을 언어 차원에서 지원하게 되었다.
object나 companion object를 사용하면 이것이 가능해진다.
다른 예시로 getActivity()도 activity와 같이 사용할 수 있다.
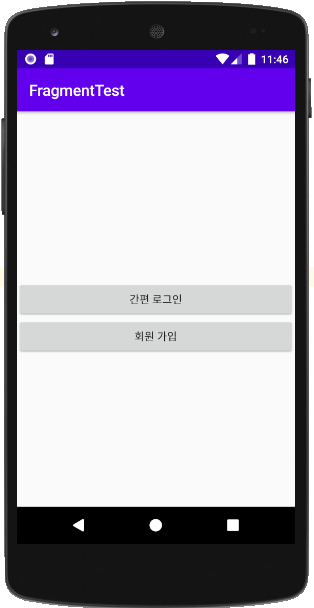
4. 실행
실행하면 바로 Fragment의 화면이 뜨게 된다.